
This post contains an affiliate link to Brillkids.com.
When I was pregnant, I was thinking “I will make so many things for the baby! Toys, blanket, clothes! I was always good with crafts, I can do this!”
Dear momma-to-be. It’s not that easy. If you still have time, work on your crafts before your baby arrives! I mean it. Once your little monkey makes her way to this world, your mind will be set on a million things, but baby DIYs. I still have a crochet half-blanket somewhere, I don’t think I will finish it unless I decide to make it for someone else’s baby in the future:)
But there IS light (at the end of the tunnel? Eh, I’d say more like a skylight on the way:). Aditya is really enjoying his tummy time and spends more time in his baby gym without me having to hand him toys or dangle play-stuff above his head, so I decided to make him a few mobiles while he was at (baby)work. Yes, not just one mobile. This baby gets bored so easily, so I thought if I’m able to finish a few of them, I can rotate them throughout the house to keep him entertained. So there will be more DIY mobiles on the way:)))
This one is for the smallest babies and I wish I made it when he was really tiny. He enjoys it anyway, but I recommend this as one of the very first mobiles for a baby. The mobile is Montessori inspired and covers the principles of many early education methods. There are lots of ways you can modify and customize your mobile. I didn’t use anybody else’s instructions, so I had to figure out some things and kinks along the way, but I hope my half-baked instructions will help you or at least inspire you!
Here are the things I used:
- black and white printouts (I used Infant Stimulation cards from BrillKids)
- construction paper (you won’t see it in the picture though, I couldn’t find any in the house, but I found 5 non-winning lottery tickets… don’t ask… and used them instead)
- glue
- scissors
- thin ribbon
- wooden sticks (I used skewers)
- steel wire (not pictured)

There was a small change along the way: the wooden skewers didn’t work very well, so I changed them for a WIRE.
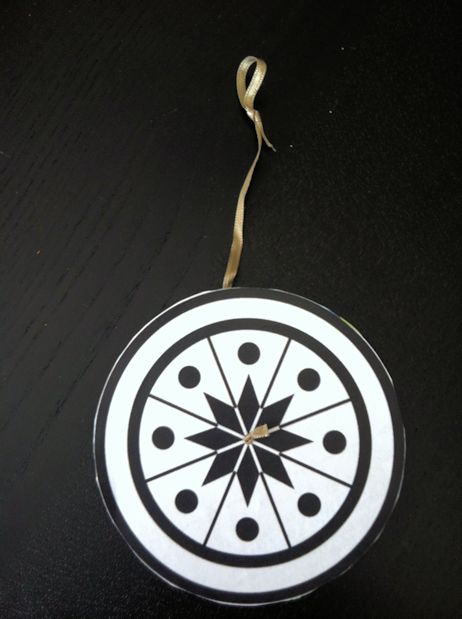
First I cut out the shapes I selected and glued them onto the cardstock (non-winning tickets, I mean;))) and then made a hole in the middle to pull a piece of ribbon through. I made a little loop at the end – this is how you will hang the pictures. You can tie them directly to your mobile base, but I wanted to make them interchangeable and use different pictures after a week.
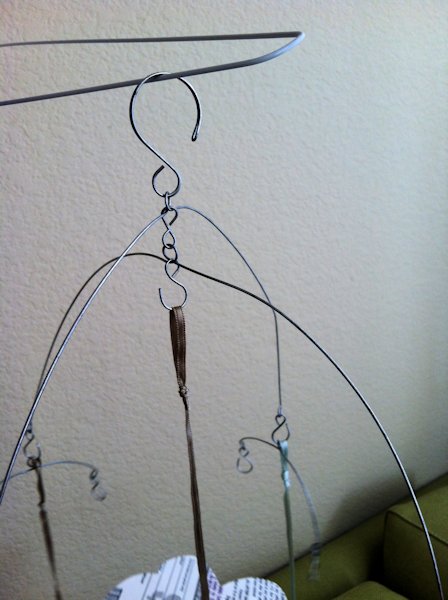
The I made a base with wire – from the top: a large hook (to hang it wherever you fancy), one wire arm – looks like an arch with a loop in the middle and on each end), loop to hang both arms above each other and the second arm – same arch with a loop in the middle and on each end.
You will want the two arms to form a cross, so the mobile’s pictures are spread out evenly.

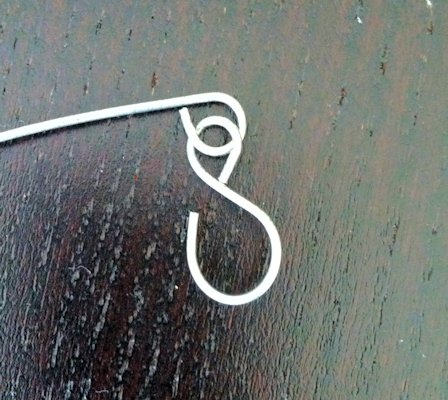
Make hooks to add at each arm’s end and one in the middle:
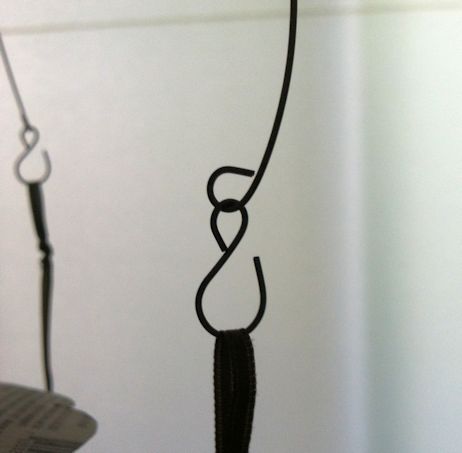
Hang your pictures and voila!


I will be delighted if you share your mobile ideas with me! And as promised, when I have time, I will post other mobiles.
This post contains an affiliate link to Brillkids.com.

No time to do a lot really……
LikeLike